
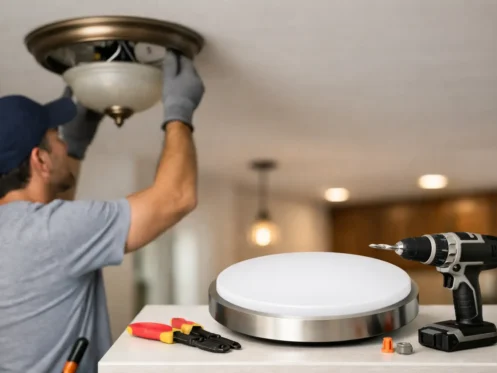
A dated ceiling light can make an otherwise well-kept room feel unfinished. Replacing it can be a worthwhile upgrade, but knowing how to replace old light fixtures safely matters more than choosing the right finish or bulb style. A fixture connects to your home’s electrical system, and older homes can hide wiring, grounding, or junction box problems that are not visible until the old light comes down.
For a straightforward fixture replacement with sound wiring and a properly supported electrical box, the work may be manageable for a homeowner who understands basic electrical safety. If anything looks damaged, confusing, or outdated, stopping and calling a licensed electrician is the safer decision. The goal is not simply to get the new fixture working. It is to make sure it is secure, correctly wired, and safe for your household long after installation day.
Start With a Safe, Real Power Shutoff
Turning off the wall switch is not enough. A switch may control only one conductor, and wiring changes made by a previous owner can create surprises. Before removing any cover or touching any wires, turn off the circuit breaker that serves the fixture.
Then verify that the power is actually off using a properly functioning non-contact voltage tester or a multimeter used according to its instructions. Test at the fixture wires, not only at the switch. It is also wise to test the tester on a known energized source before and after checking the fixture. This confirms the tester itself is working.
Let everyone in the home know that electrical work is underway, and avoid leaving an open electrical box unattended. If your panel is not labeled clearly, or the breaker that should control the fixture does not shut it off, that is a good reason to pause. Unidentified circuits are a common issue in older homes and rental properties, and they deserve a proper diagnosis.
What to Check Before Removing the Old Fixture
After confirming the circuit is off, remove the shade, bulbs, and decorative parts first. Fixtures can be heavier than they appear, especially older chandeliers, fans with light kits, and glass fixtures. Have someone steady the fixture if needed while you loosen its mounting screws.
Before disconnecting anything, look closely at the wiring and electrical box. Take clear photos of the existing connections for reference, but do not rely on matching wire colors alone. Electrical systems may have been altered over decades, and color conventions do not guarantee a correct or safe connection.
Pay attention to warning signs such as:
- Brittle, cracked, cloth-covered, or scorched wire insulation
- Loose wire connections, damaged wire nuts, or exposed copper beyond the connection
- A missing ground wire or a metal box that is not properly grounded
- Rust, heat marks, water staining, or a burning odor around the fixture or box
- A box that moves, sits crooked, or is not firmly attached to the framing
Any one of these conditions can turn a simple lighting update into an electrical repair. Installing a new fixture over a poor connection may hide the problem temporarily, but it does not permanently resolve it.
The Electrical Box Has to Support the Fixture
A light fixture should mount to an approved electrical box, not directly to drywall, plaster, or a ceiling surface. The box must be secure and rated to carry the fixture’s weight. This point is especially important with substantial entryway lights, dining room fixtures, and decorative fixtures with glass or metal components.
If a fixture is heavier than the box rating allows, the box and mounting hardware may need to be replaced. Ceiling fans require a fan-rated box and bracing, even if the fan has a light kit. A standard lighting box is not automatically rated for the vibration and weight of a ceiling fan.
Do not try to compensate for a loose box with longer screws, drywall anchors, extra caulk, or improvised brackets. A falling fixture can injure someone and pull live conductors loose inside the ceiling.
Connect the New Fixture According to Its Instructions
Every fixture manufacturer provides installation directions, and those directions should take priority for that specific product. In a typical modern installation, the fixture’s hot conductor connects to the switched hot wire, the neutral connects to the neutral, and the grounding conductor connects to the grounding wire or approved grounded metal box.
That said, “typical” is not the same as guaranteed. Multiple cables in the box, switch loops, dimmers, smart switches, three-way switches, or older wiring methods can make the connections less obvious. If you see more wires than expected, wires joined in ways you do not understand, or no clearly identifiable ground, do not guess.
Use listed connectors sized for the conductors being joined, and make sure no bare copper is exposed outside the connector except where a grounding connection requires it. Gently tug each connected wire to confirm it is secure, then fold the conductors carefully into the box without pinching or sharply bending them.
The fixture canopy should sit flush to the ceiling or wall as designed, but it should not be forced into place. If the canopy will not fit over the wiring or mounting bracket, revisit the installation rather than tightening screws until something bends. Pressure on wire insulation or loose mounting hardware can create problems that may not show up until later.
Choose Bulbs and Controls That Match the Fixture
A new fixture is only as safe as the lamps and controls used with it. Never exceed the fixture’s maximum wattage rating. LED bulbs use far less energy than older incandescent bulbs, but you should still follow the fixture’s stated limits and any bulb-shape requirements.
If you are installing LEDs on a dimmer, confirm that both the bulbs and the dimmer are labeled compatible. Flickering, humming, delayed turn-on, or lights that will not dim smoothly often point to an incompatible dimmer or a wiring issue. Replacing bulbs repeatedly may not solve the underlying cause.
Bathroom, exterior, garage, and damp-area fixtures need ratings appropriate for the location. A decorative indoor fixture may look right above a porch or bathroom vanity, but moisture can damage components not designed for those conditions. For bathrooms, placement near tubs and showers also affects what equipment and protection may be required.
When Replacing an Old Light Fixture Is Not a DIY Job
There is no benefit in pushing through electrical uncertainty. Call a licensed electrician when the fixture replacement reveals old or damaged wiring, no grounding path, a loose or damaged box, water intrusion, breaker trips, buzzing, or signs of heat. The same applies when a fixture is unusually heavy, mounted high on a stairwell ceiling, or part of a circuit with multiple switches or smart controls.
Older homes in Mebane and throughout the Durham-Burlington area may have wiring added during different renovations. One room may contain newer cable while another has aging insulation, questionable splices, or boxes that no longer meet current installation needs. A qualified electrician can identify what is there, explain the repair clearly, and recommend the right next step without turning a small lighting project into unnecessary work.
For property managers and Realtors, professional fixture installation can also help prevent last-minute inspection concerns, tenant maintenance calls, and avoidable liability. A polished fixture is an upgrade. A secure, properly wired fixture is an upgrade that holds up.
Test Carefully After Installation
Once the fixture is mounted and the cover is in place, restore power at the breaker and operate the light from the switch. Check that it turns on normally, remains stable, and does not flicker, buzz, smell hot, or trip the breaker.
Do not dismiss unusual behavior because the light technically works. A breaker that trips, a warm switch plate, intermittent operation, or a faint burning smell are reasons to shut the circuit off and have the issue inspected. Electrical problems often give early warnings before they become more serious.
A new light fixture should bring better light and a finished look to the room, not leave you wondering what is happening behind the ceiling. When the wiring, support, and connections are all right, it is a small upgrade that can make a home feel safer and more comfortable every day.